
Sharing your Canva design doesn’t have to mean exporting files and sending attachments back and forth. Canva lets you generate a shareable link so anyone — teammates, clients, or friends — can view or edit your design instantly in their browser. This is one of the fastest ways to collaborate or showcase your work.
In this guide, you’ll learn exactly how to share a Canva design using a link, how to control what others can do with it, and how to troubleshoot common sharing issues.
Why Share a Canva Design with a Link
Sharing via link is faster and more flexible than downloading and emailing files. It allows you to:
- Let others view or comment on your design without needing a Canva account for viewing
- Collaborate in real time with editors on the same project
- Present your design instantly in a meeting or chat without exporting a file
- Control exactly what level of access each person has
Once you understand the sharing settings, you can decide precisely how open or restricted your design should be.
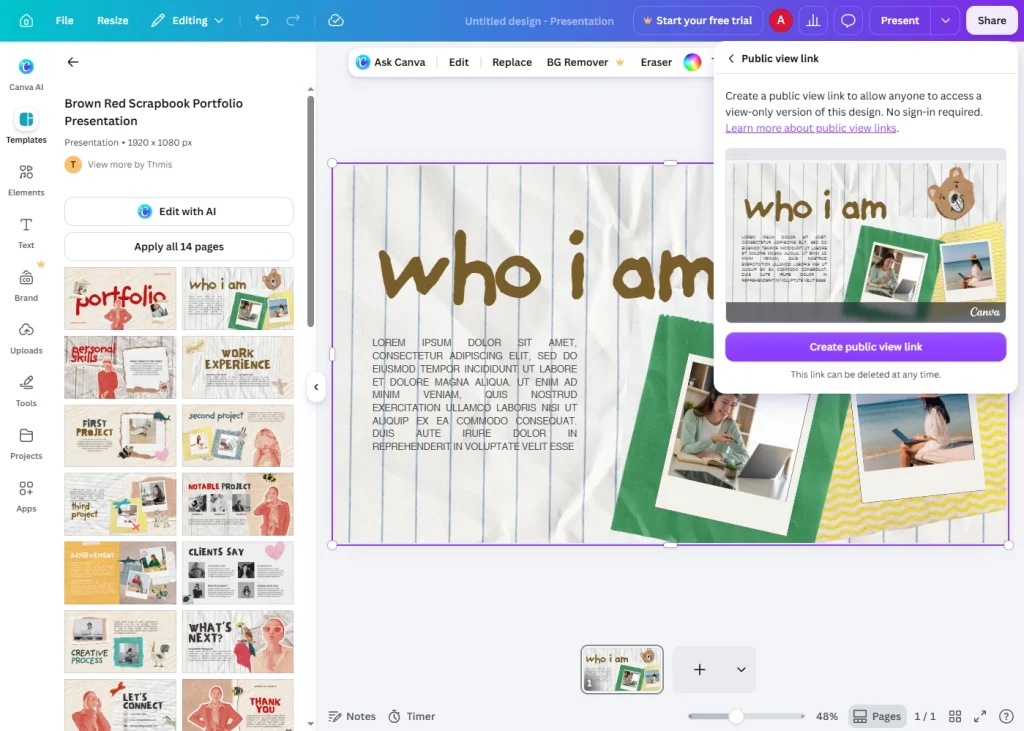
Step 1: Open the Design You Want to Share
Log in to Canva and open the design from your Projects page, or continue working in the editor if you’re already there.
Step 2: Click the Share Button
In the top-right corner of the Canva editor, click the Share button. This opens a panel with several sharing options, including the link-sharing section.
Step 3: Set the Link Sharing Permissions
Within the Share panel, look for the “Anyone with the link” section. Click the dropdown menu next to it to choose what people can do with your design:
- Can view: Recipients can only look at the design, not make changes.
- Can comment: Recipients can leave comments and feedback but can’t edit.
- Can edit: Recipients can make direct changes to the design.
Pick the option that matches how much control you want to give the people you’re sharing with.
Step 4: Copy the Shareable Link
Once you’ve selected the right permission level, click Copy link. Canva generates a unique URL for your design and copies it to your clipboard automatically.
Step 5: Send the Link to Others
Paste the copied link into an email, chat app, or wherever you need to share it. Anyone who opens the link will see your design according to the permission level you set in Step 3.
Step 6: Adjust or Revoke Access Anytime
If you change your mind about who can access your design, you can update the permissions at any time:
- Open the design and click Share again.
- Change the dropdown from “Can edit” to “Can view” (or vice versa) as needed.
- To fully disable the link, click “Anyone with the link” and switch it to “Only people invited”, which deactivates the public link.
This gives you full control even after the link has already been sent out.
Alternative: Share with Specific People by Email
If you’d rather not use a public link, you can invite specific people directly:
- Click Share.
- In the “Invite people” field, type their email address.
- Select their permission level (Can view, Can comment, or Can edit).
- Click Invite.
This sends a notification directly to their Canva account or email, and access is limited to that person only.
Common Issues With Sharing Links
The recipient can’t open the link Double-check that the sharing setting is on “Anyone with the link” rather than “Only people invited,” which restricts access to specific accounts only.
Recipient can view but not edit This means the link permission is set to “Can view.” Go back to the Share panel and change it to “Can edit” if collaboration is needed.
Link seems to have stopped working If someone previously disabled the public link or changed it to “Only people invited,” the old link will no longer grant access. Generate and share a new link if needed.
Too many people can edit the design If you shared an editable link publicly, anyone with that link can make changes. Switch the permission to “Can view” or “Can comment” to prevent unwanted edits.
Tips for Sharing Canva Designs Effectively
- Use “Can view” for final designs you don’t want altered, especially when sharing with clients.
- Use “Can edit” for active collaboration with your team during the design process.
- Revoke public links once a project is finished to keep your design secure.
- Use email invites instead of public links when you want to limit access to specific people only.
Final Thoughts
Sharing a Canva design with a link is quick, flexible, and doesn’t require exporting or downloading files. By understanding the different permission levels and knowing how to manage access, you can collaborate smoothly with your team while keeping full control over your work.
Next time you finish a design, skip the file export — just click Share and send the link.