
If you’ve ever accidentally moved a background, nudged a logo out of place, or dragged an element you didn’t mean to touch — Canva’s lock feature is the fix. Locking an element pins it to its position on the canvas so it can’t be selected, moved, resized, or edited until you unlock it. This guide covers everything you need to know about locking and unlocking elements in Canva, including when to use it, how it works with groups, and what locking does and doesn’t protect.
What Does Locking an Element Do in Canva?
When you lock an element in Canva, it becomes:
- Unselectable — clicking it doesn’t select it
- Immovable — it can’t be dragged or repositioned
- Unresizable — handles won’t appear even if you manage to select it through the layers panel
- Excluded from group selections — selecting all (Ctrl + A / Cmd + A) skips locked elements
- Visually marked — a small padlock icon appears on the element when you hover over it
Locking does not make an element invisible or prevent it from appearing in your exported design. It purely restricts editing interaction within the Canva editor.
Why Lock Elements in Canva?
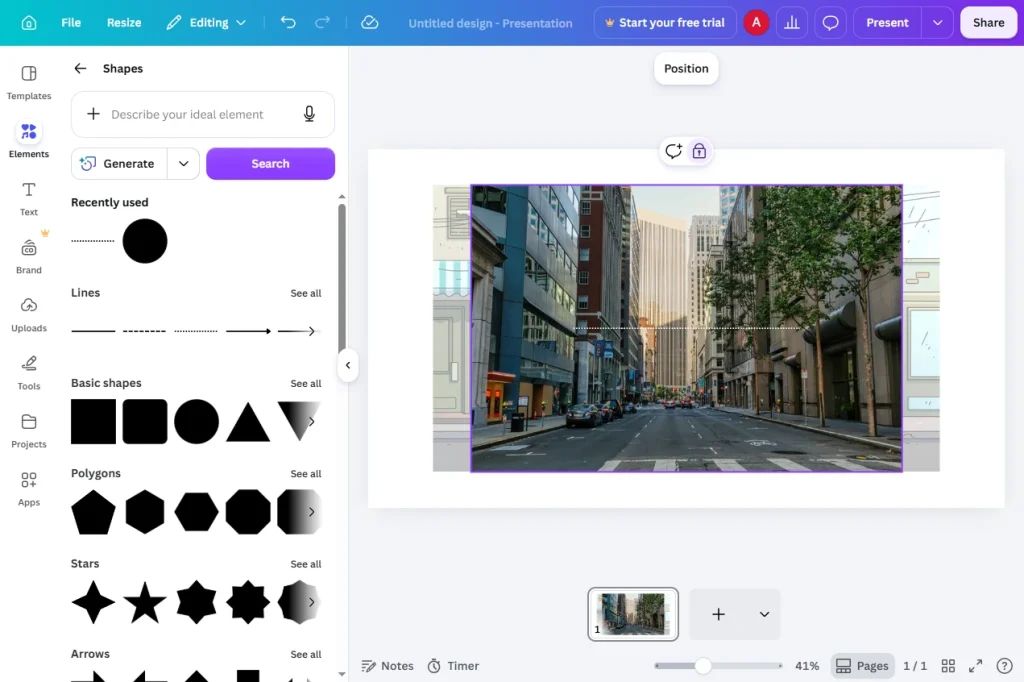
Locking is especially useful in these scenarios:
- Protecting backgrounds — prevent an image or color background from being accidentally selected when clicking around the canvas
- Anchoring logos and brand marks — keep your logo in its designated position throughout editing
- Preserving template structure — lock layout elements (borders, frames, decorative shapes) so only content areas remain editable
- Team collaboration — when sharing a design with teammates, lock elements that shouldn’t be changed
- Multi-page designs — lock repeated header or footer elements so they stay consistent across pages
- Working on dense layouts — lock elements you’ve finished editing so your clicks only interact with elements still in progress
How to Lock an Element in Canva
Method 1: Right-Click Menu (Fastest)
- Click the element you want to lock to select it
- Right-click the element
- Select Lock from the context menu
A small padlock icon (🔒) appears on the element, confirming it’s locked.
Method 2: Via the Position Panel
- Select the element
- Click Position in the top toolbar
- In the Arrange tab, click the Lock button (padlock icon) at the top of the panel
Method 3: Via the Layers Panel
The Layers panel gives you a visual overview of every element on your canvas and lets you lock elements without selecting them directly — useful when elements are stacked or hard to click.
- Click File → View settings → Show layers panel (or look for the layers icon in the left sidebar)
- Find the element you want to lock in the layers list
- Hover over the layer row — a padlock icon appears on the right
- Click the padlock icon to lock that element
The padlock turns solid, indicating the element is locked.
How to Unlock an Element in Canva
Method 1: Right-Click the Element
- Hover over the locked element — the padlock icon appears
- Right-click directly on the element
- Select Unlock from the context menu
Method 2: Via the Layers Panel
- Open the Layers panel
- Find the locked element (it shows a solid padlock icon)
- Click the padlock icon to toggle it off
The element is now fully editable again.
Method 3: Via the Position Panel
- Click on the locked element through the Layers panel to select it
- Open Position → Arrange
- Click the padlock icon again to unlock
Tip: You can’t select a locked element directly on the canvas by clicking it. To select it for unlocking, use the Layers panel — it lets you click locked layers and access their properties without needing to click the element on the canvas.
How to Lock Multiple Elements at Once
Canva doesn’t have a single “lock all” button, but you can lock multiple elements efficiently:
Lock Several Elements Individually via Layers Panel
- Open the Layers panel
- Lock each element one by one by clicking their padlock icons
Lock a Group
If multiple elements work together as a unit (e.g., a logo + tagline), group them first and then lock the group:
- Select all elements you want to lock together (Shift + click or drag to select)
- Press Ctrl + G (Windows) / Cmd + G (Mac) to group them
- Right-click the group → Lock
The entire group is now locked as a single unit. Individual elements within the group remain locked together and can’t be edited unless you unlock the group first.
How to Lock the Background in Canva
Accidentally clicking the background when you mean to select a foreground element is one of the most common frustrations in Canva. Locking the background prevents this entirely.
For a Solid Color Background
- Click on the canvas background (an empty area with no elements)
- Right-click → Lock
For an Image Background
- Click the background image to select it
- Right-click → Lock
Once locked, clicking anywhere on the background area passes through to the elements above it instead.
Locking Elements vs. Grouping Elements
These two features are often confused. Here’s the key difference:
| Feature | Locking | Grouping |
|---|---|---|
| Purpose | Prevent accidental editing | Move/edit multiple elements together |
| Selectability | Element cannot be selected on canvas | Group is selectable as one unit |
| Editability | No editing until unlocked | Individual elements editable inside group |
| Visibility | Still visible and exported | Still visible and exported |
| Use case | Protecting finished elements | Organizing related elements |
You can combine both: group elements, then lock the group. This protects the entire group from accidental changes while keeping its internal structure intact for when you do need to edit it.
Locking Elements in Canva for Teams
When collaborating on a shared Canva design, locking is a lightweight way to communicate “don’t touch this” without removing a teammate’s editing access.
Best Practices for Team Use
- Lock brand elements before sharing — lock your logo, color backgrounds, and brand frames before inviting collaborators
- Add a text note — add a small locked text box near sensitive elements saying “Do not edit — brand asset”
- Use Canva Teams Brand Kit — for larger teams, store brand assets in the Brand Kit where they’re centrally managed and not part of individual design files
Note: Locking is editor-level, not permission-level. A collaborator with edit access can still unlock elements you’ve locked. For true protection, use view-only sharing (Share → set role to “Can view”) for stakeholders who shouldn’t edit at all.
What Locking Does NOT Do
Understanding the limits of locking helps you use it correctly:
- Does not hide the element — locked elements are fully visible on the canvas and in exports
- Does not prevent unlocking — any collaborator with edit access can unlock elements
- Does not apply across pages — locking an element on page 1 of a presentation does not lock the same element on page 2; each page must be locked separately
- Does not survive copying — if you duplicate a page or copy a locked element, the copy is unlocked by default
- Does not restrict exports — locked elements appear in downloaded files exactly like unlocked ones
Locking Elements on the Canva Mobile App
The lock feature is available on iOS and Android, though the path is slightly different.
Steps (iOS and Android)
- Tap the element you want to lock to select it
- Tap the three-dot menu (⋯) that appears above the element or in the toolbar
- Scroll through the options and tap Lock
To unlock on mobile:
- Tap and hold the locked element (or access it via the layers view if available)
- Tap Unlock from the menu
Keyboard Shortcuts Related to Locking
Canva doesn’t have a dedicated keyboard shortcut for locking, but these shortcuts help you work faster around locked elements:
| Action | Windows / Linux | macOS |
|---|---|---|
| Select all (skips locked) | Ctrl + A | Cmd + A |
| Group selected elements | Ctrl + G | Cmd + G |
| Ungroup | Ctrl + Shift + G | Cmd + Shift + G |
| Undo (including accidental unlocks) | Ctrl + Z | Cmd + Z |
Common Issues and Fixes
| Problem | Cause | Fix |
|---|---|---|
| Can’t click an element | It’s locked | Open Layers panel → click the layer → unlock |
| Ctrl + A doesn’t select everything | Some elements are locked | Unlock elements first, or use Layers panel to select manually |
| Locked element still moves | You may have selected a different overlapping element | Check the Layers panel to confirm which element is locked |
| Lock option doesn’t appear in right-click menu | Nothing is selected | Click the element first to select it, then right-click |
| Copied page has unlocked elements | Locking doesn’t carry over to duplicates | Re-lock elements on each duplicated page |
Frequently Asked Questions
Is locking elements available on the free Canva plan?
Yes. Locking and unlocking elements is available on all Canva plans, including the free tier. No Pro subscription is required.
Can I lock all elements on a page at once?
Not with a single button. You need to lock elements individually or lock a group. As a workaround, select all elements (Ctrl + A / Cmd + A), group them (Ctrl + G), and lock the group — this effectively locks everything on the page in one action.
Does locking prevent my design from being edited by others?
No. Locking is an editor-level protection — any collaborator with edit access can unlock elements. For read-only protection, share the design with Can view permissions instead of Can edit.
Can I lock elements on specific pages in a multi-page design?
Yes, but locking must be done per page. There’s no option to lock an element globally across all pages. For repeating locked elements (headers, footers), lock them individually on each page.
Will locked elements appear in my downloaded design?
Yes. Locking only affects editing behavior inside the Canva editor. All locked elements export and download exactly like unlocked ones.
Can I lock a text box so the font and layout are fixed but the text is still editable?
No. Locking in Canva is all-or-nothing — a locked text box cannot be edited at all until it’s unlocked. There’s no partial lock that protects formatting while allowing text content changes.
Final Thoughts
Locking elements in Canva is a small habit that pays off every time you work on a complex design. A few seconds spent locking your background, logo, and structural elements before diving into content editing prevents the frustration of accidentally displacing something you spent time positioning perfectly.
It’s also one of the most considerate things you can do before sharing a design with a collaborator — clear visual signals about what’s intentional and what’s open for editing make teamwork smoother for everyone.